OpenShift Deployment (introduced in v6.1.0)
This section applies to Boomi Cloud API Management - Local Edition version 6.1.0 and above.
OpenShift allows enforcing restrictions, and cloud-hosted OpenShift environments leverage those restrictions. OpenShift requires larger integer values (GID and UID) for users and groups, so it is necessary to update the values with the larger integer values. Refer to sa.scc.uid-range for the OpenShift project.
ROSA
ROSA enforces privileged access to project resources, which blocks the OAuth feature. This section provides alternative approaches for such scenarios.
When you create a new OpenShift project, it is assigned restricted permissions by default. The OAuth curl call works properly with restricted OpenShift project.
However, if you create a new OpenShift project with privileged permissions, the OAuth curl call fails. To fix this, follow the steps provided in Creating an Application when the OpenShift project is privileged section.
Prerequisites
-
Create a new project capiml6 in the OpenShift cluster.
[ec2-user@ip-10-0-0-174 ~]$ oc new-project capiml6 -
Verify if the pod security permission is restricted or privileged. Refer to
pod-security.kubernetes.io/auditandpod-security.kubernetes.io/warnin the following command to verify the OpenShift project permissions.Below is the details of an OpenShift project created with restricted permission.
[ec2-user@ip-10-0-0-174 ~]$ oc get project capiml6 -o yaml
  apiVersion: project.openshift.io/v1
  kind: Project
  metadata:
    annotations:
      openshift.io/description: ""
      openshift.io/display-name: ""
      openshift.io/requester: cluster-admin
      openshift.io/sa.scc.mcs: s0:c29,c4
      openshift.io/sa.scc.supplemental-groups: 1000820000/10000
      openshift.io/sa.scc.uid-range: 1000820000/10000
    creationTimestamp: "2024-12-10T10:02:53Z"
    labels:
      kubernetes.io/metadata.name: capiml6
      pod-security.kubernetes.io/audit: restricted
      pod-security.kubernetes.io/audit-version: v1.24
      pod-security.kubernetes.io/warn: restricted
      pod-security.kubernetes.io/warn-version: v1.24
    name: capiml6
      resourceVersion: "12242600"
      uid: 8a0defa1-acef-44a8-990c-070122a128d7
    spec:
      finalizers:
      - kubernetes
    status:
      phase: Active
Below is the details of an OpenShift project created with privileged permission.
[ec2-user@ip-10-0-0-174 ~]$ oc get project capiml6 -o yaml
apiVersion: project.openshift.io/v1
kind: Project
metadata:
  annotations:
    openshift.io/description: ""
    openshift.io/display-name: ""
    openshift.io/requester: cluster-admin
    openshift.io/sa.scc.mcs: s0:c28,c17
    openshift.io/sa.scc.supplemental-groups: 1000790000/10000
    openshift.io/sa.scc.uid-range: 1000790000/10000
  creationTimestamp: "2024-11-12T06:14:54Z"
  labels:
    kubernetes.io/metadata.name: capiml6
    pod-security.kubernetes.io/audit: privileged
    pod-security.kubernetes.io/audit-version: v1.24
    pod-security.kubernetes.io/warn: privileged
    pod-security.kubernetes.io/warn-version: v1.24
  name: capiml6
  resourceVersion: "10889964"
  uid: a633902d-55f3-45aa-ab10-7701b8271f96
spec:
  finalizers:
  - kubernetes
status:
  phase: Active
Creating an application when the OpenShift project is privileged
If your organization's policies do not allow setting permissions other than restricted, you can use the following workaround to leverage oauth functionality.
Procedure
-
Log in to Boomi Cloud API Management.
-
Create API Definition. For example,
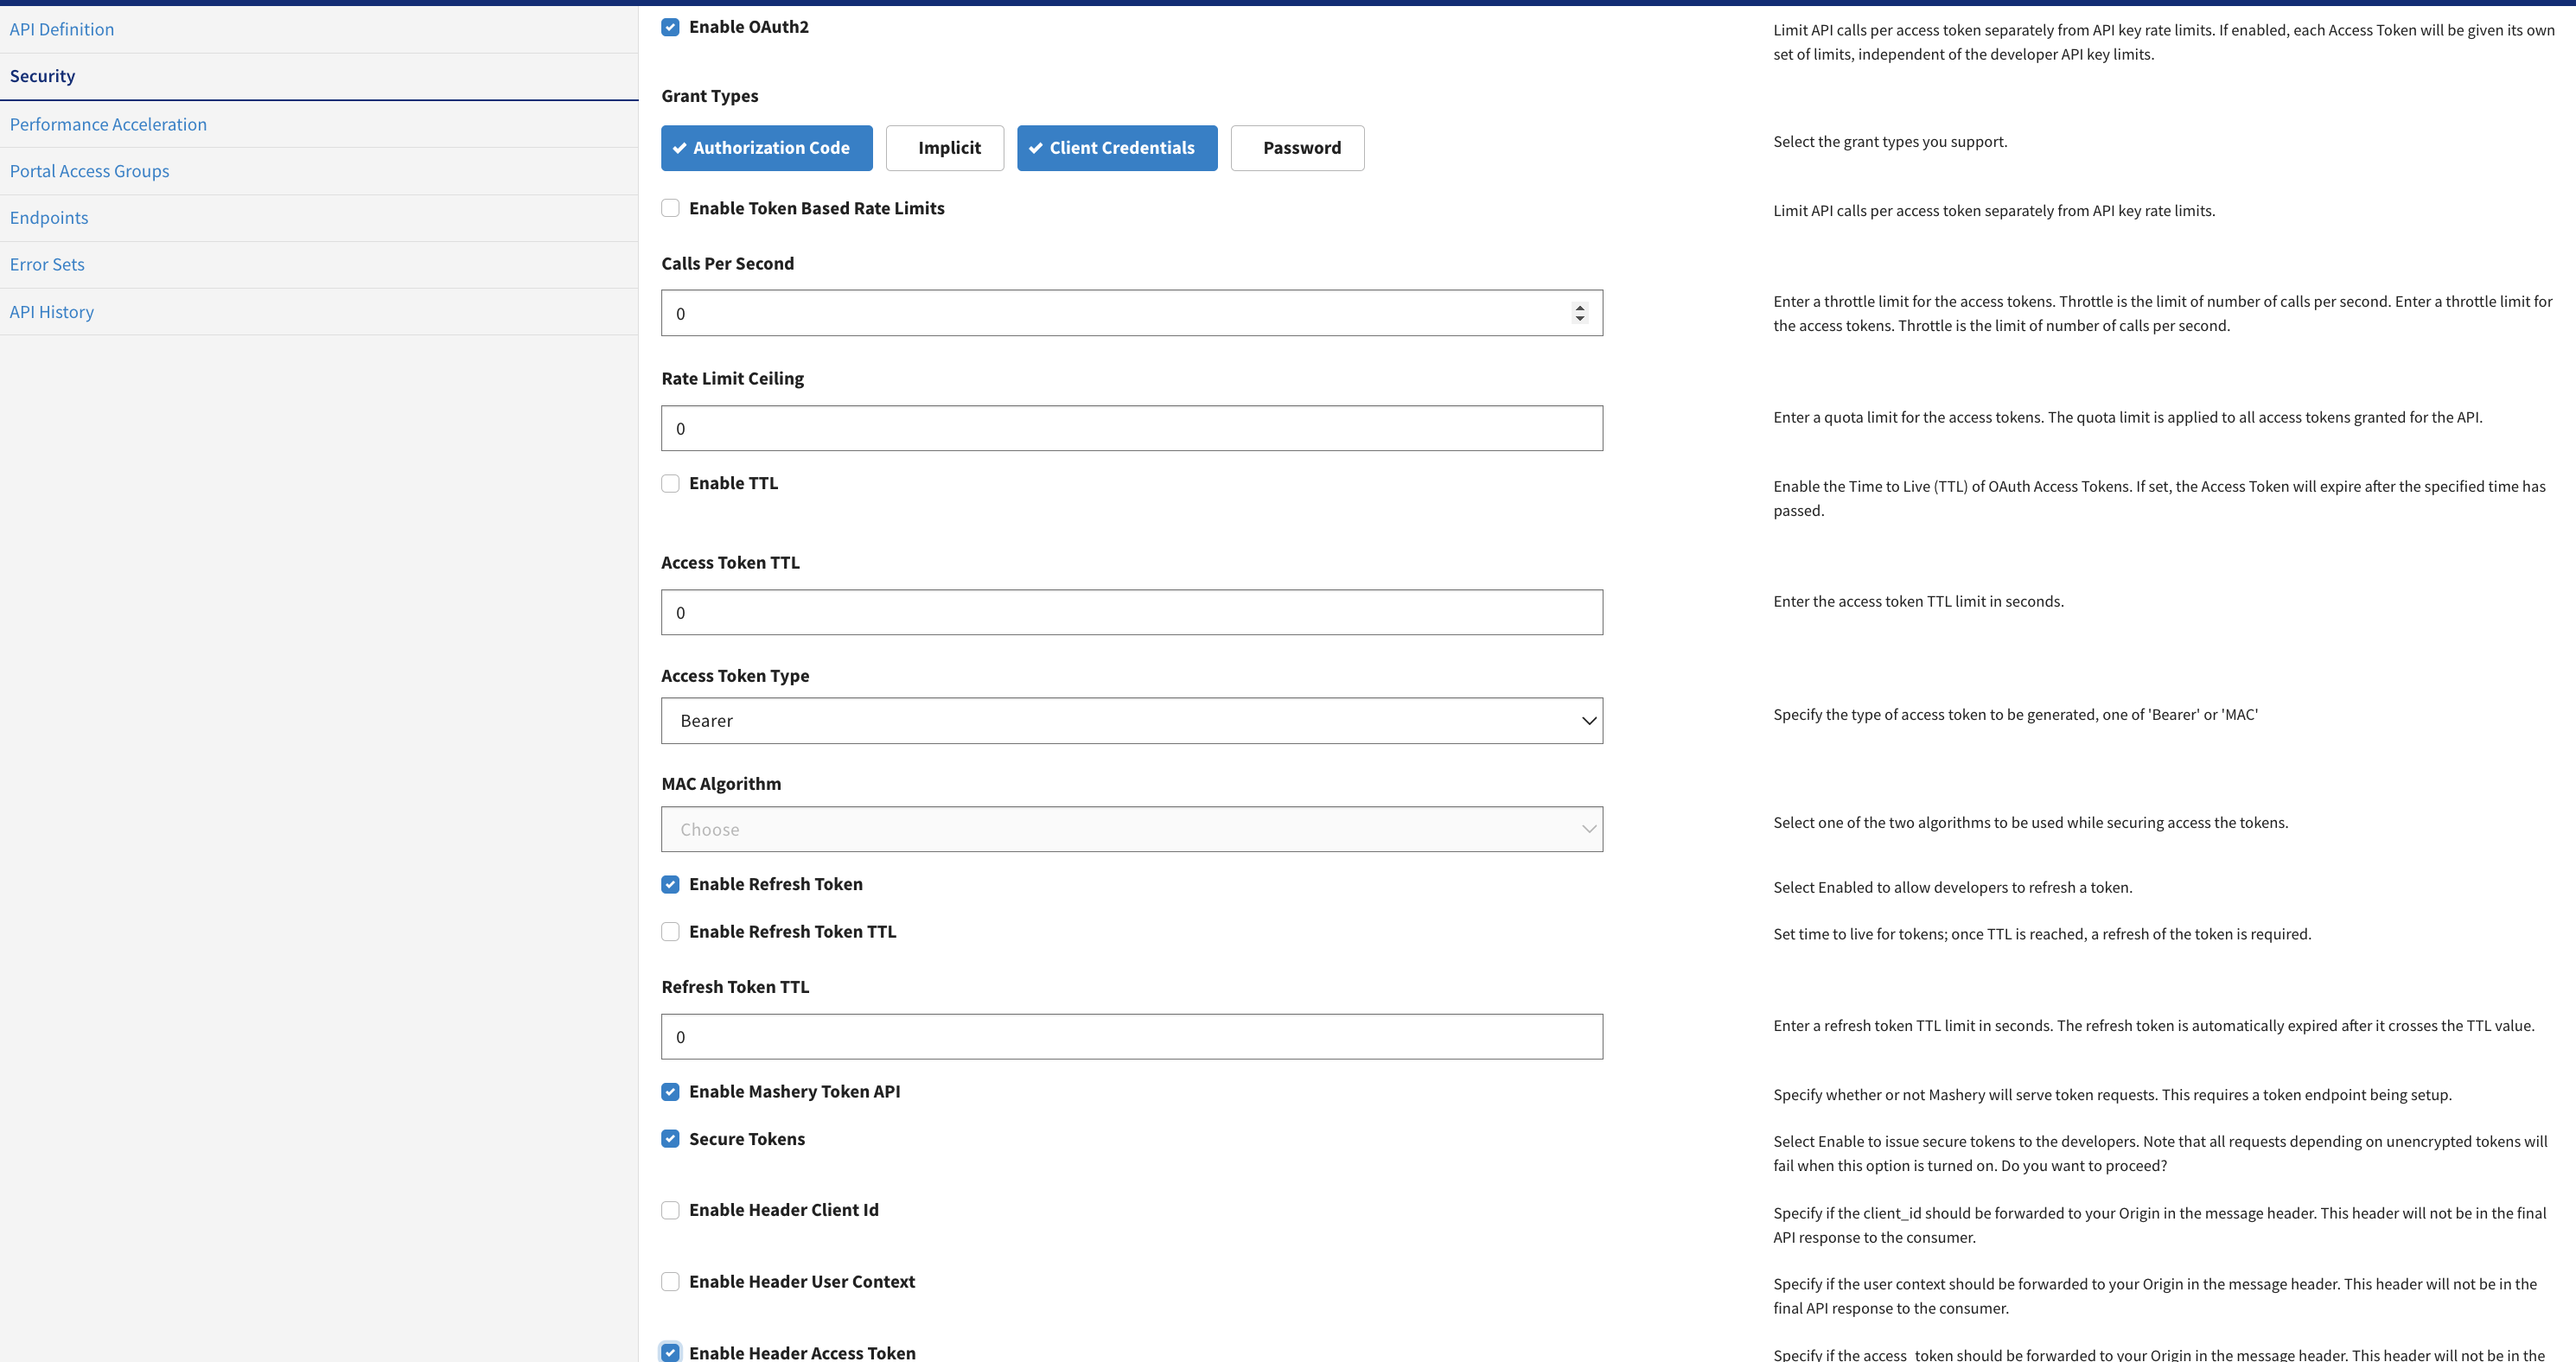
LeoTestAPI. Navigate to API Definition>LeoTest> Security, and provide the following values:-
Enable OAuth 2.0: Select to enable oAuth 2.0.
-
Grant Types: Select the grant type you want to provide to the user.
-
Enable Refresh Token: Select to enable refresh token.
-
Enable Mashery Token API: Select to enable Mashery token API.
-
Secure Tokens: Select to enable secure tokens.
-
Enable Header Access Token: Select to enable header access token.
-
-
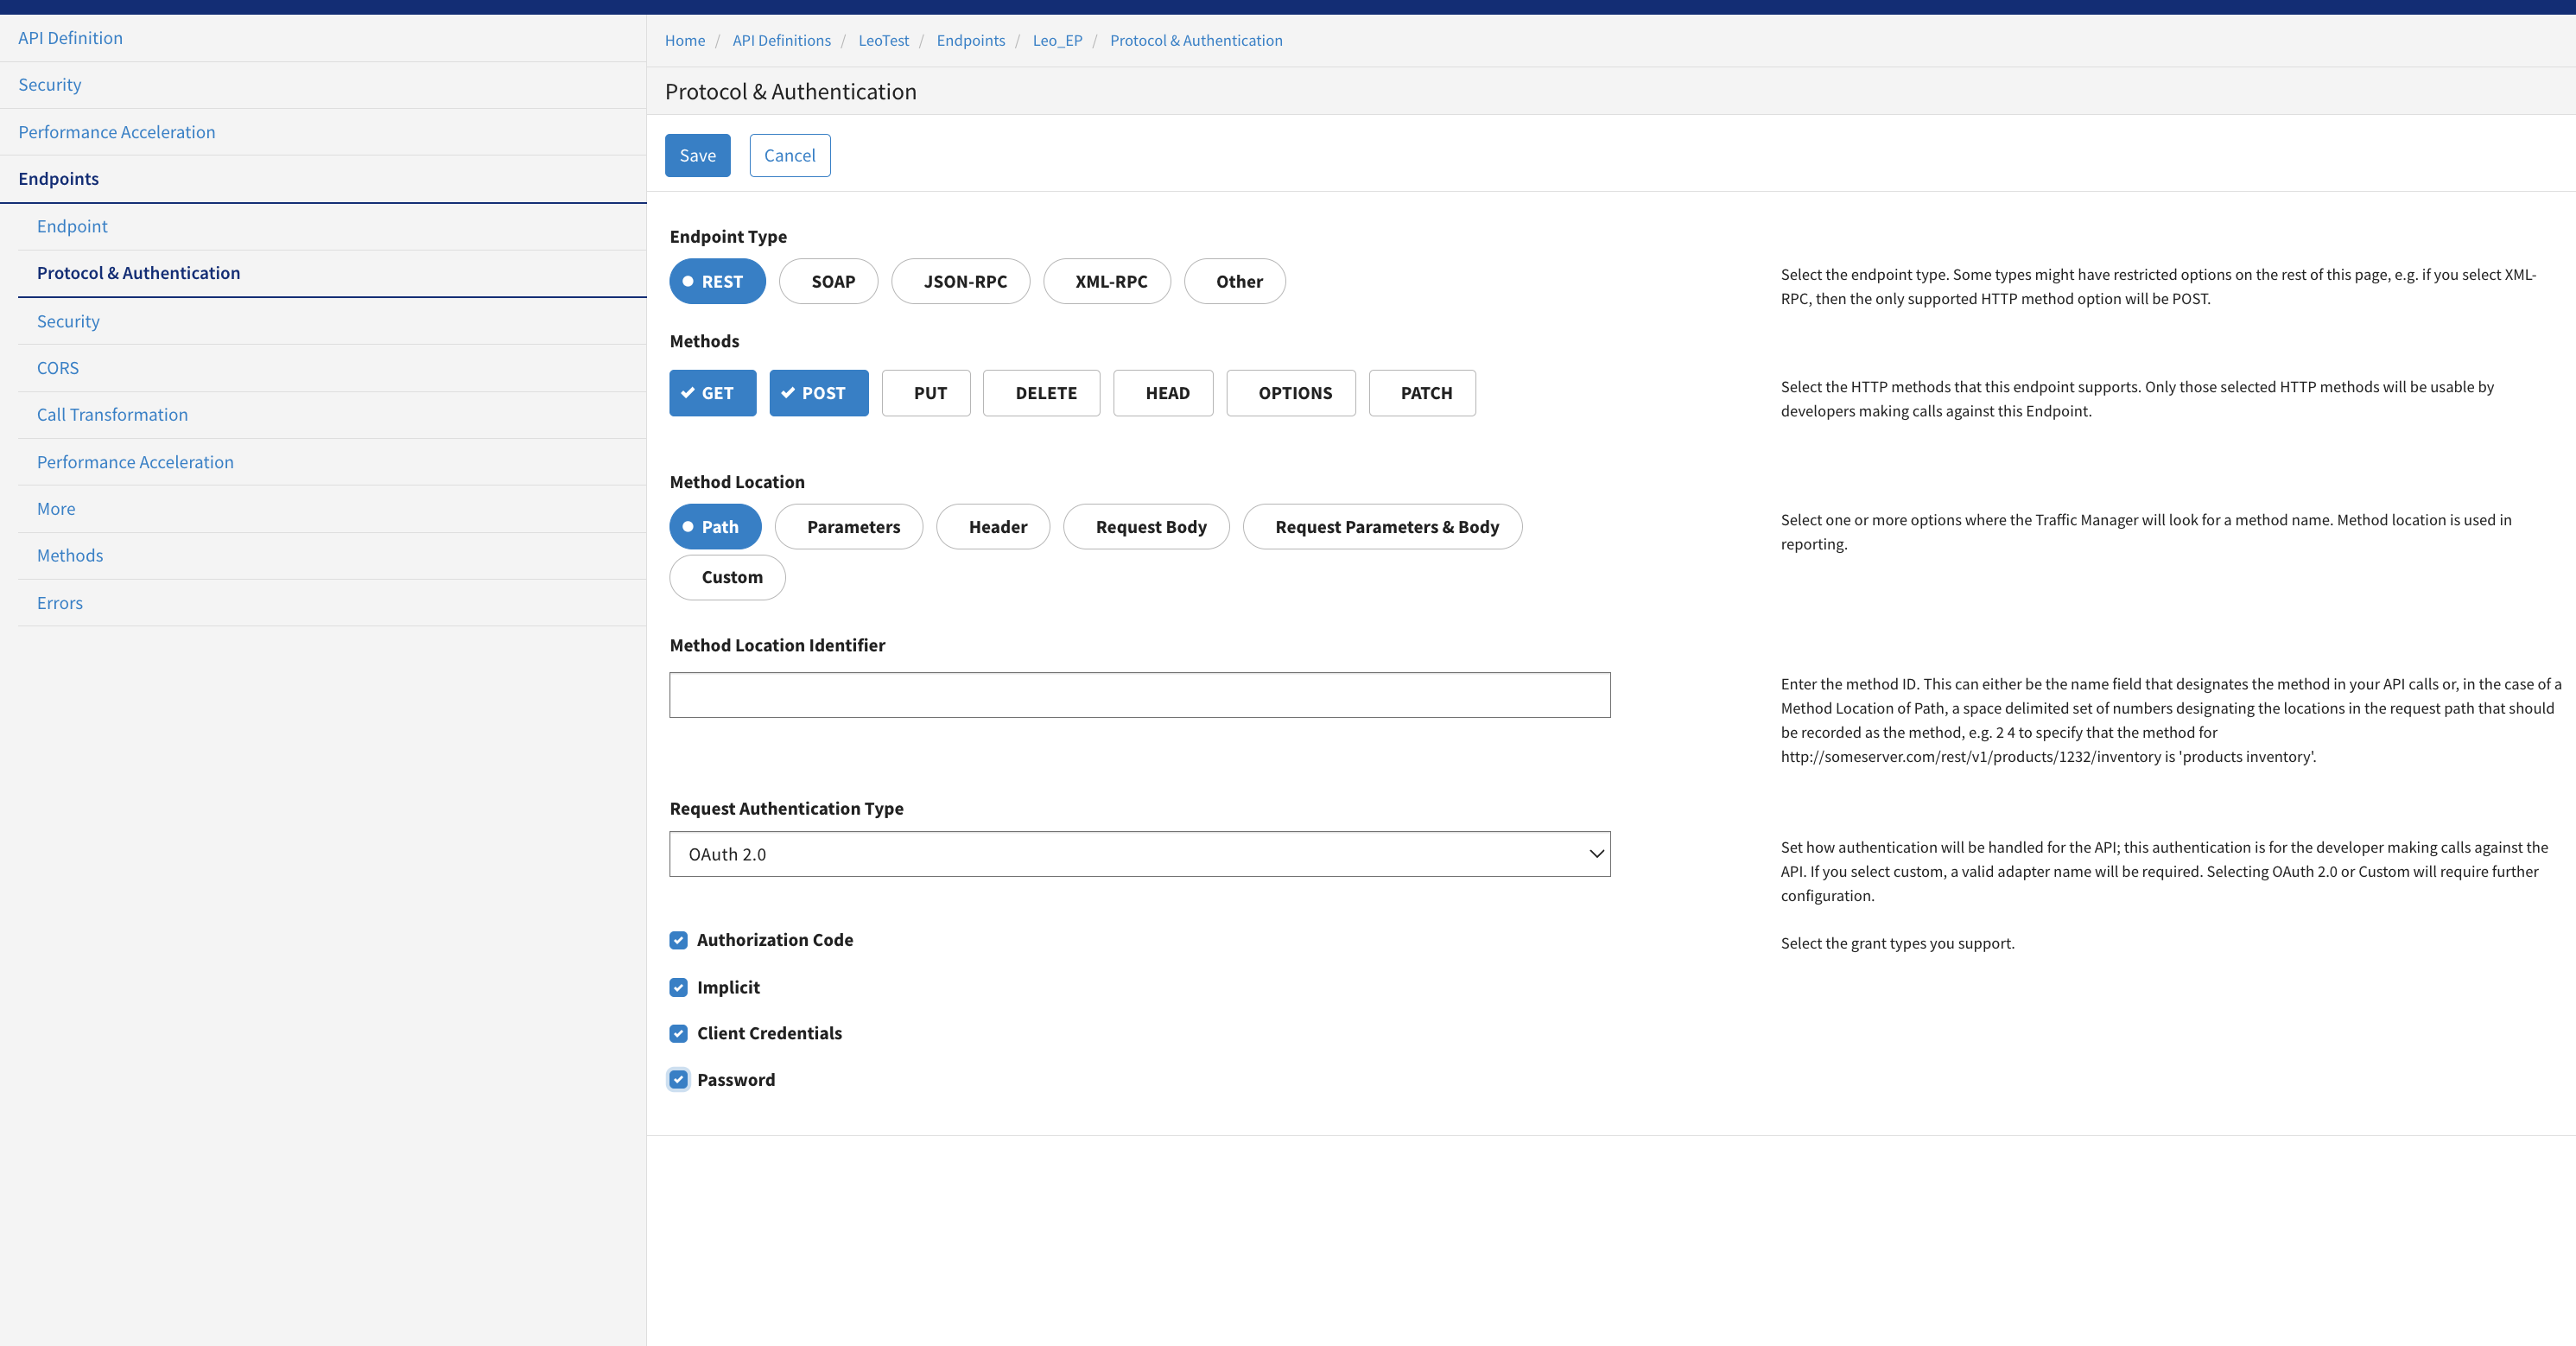
Navigate to Endpoints>API Definitions>LeoTest. Click New Endpoint. The Endpoints page opens.
-
Type: Select Token Endpoint from the drop-down.
-
Name: Enter the name of the endpoint.
-
Required Mutual TLS (MTLS): Leave it blank.
-
Published Endpoint: Leave it with the default value.

-
-
Click Save. The Protocol & Authentication page opens.
-
In Protocol & Authentication page, provide the following values:
-
Endpoint Type: Select the endpoint type.
-
Methods: Select the HTTP methods.
-
Method Location: Select method location.
-
Method Location Identifier: Enter the method location identifier.
-
Request Authentication Type: Select the request authentication type. For example, OAuth 2.0. Based on your selection of request authentication type, select the grant types.
-
-
- Navigate to API Package>LeoTest>Key Properties.
- Enable Generate Shared Secrets.
-
Create API Plan under the same API Package.
- Navigate to the Plan Contents, add
LeoTestAPI and both the endpoints created on the Plan level.
- Navigate to the Plan Contents, add
-
-
Select the API Package and Plan created in the above steps to create the Package Key.
-
Token Generate Call
curl -v -X 'POST' -d 'grant_type=client_credentials&client_id=LeoTest&client_secret=LeoTest&redirect_uri=https://www.google.com' -H 'X-Mashery-Debug:59fwcppy7fxhs7en23na5tyd' -H 'Content-Type:application/x-www-form-urlencoded' 'http://calypsoqa.api.mashery.com/GetMeToken'
Resource Endpoint Call
curl -X GET "http://calypsoqa.api.mashery.com/LeoTest" -H "accept: application/json" -H "authorization: Bearer 5fbfhkxaa5jrexgssxber4w4"
